
Connecticut Screen Works Screen Wall System®
Installation Instructions
Listed below are the most common methods of installation. These are by no means all possibilities. Not all may work in your application, in fact, you may find that none do. You may need to modify a method shown, utilize a combination of methods or design your own based upon your requirements. You cannot calculate panels sizes until you determined installation. Read .pdf versions for complete information.
Please review MULLING PANELS if your installation requires 2 or more panels in an opening.
Small Stop Mount
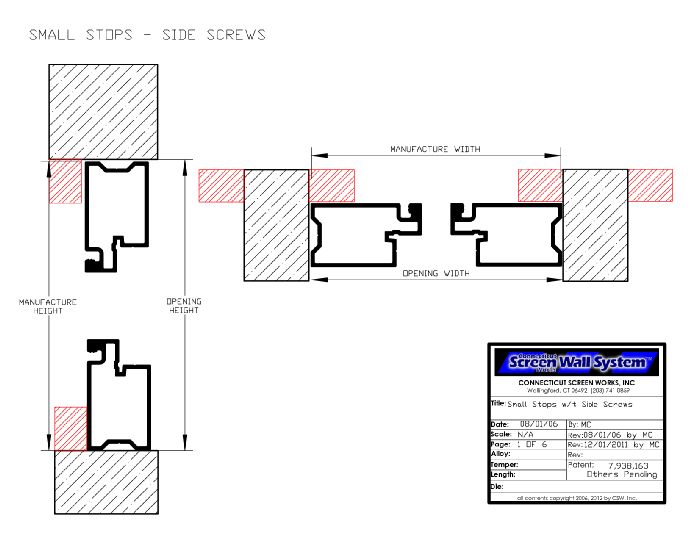
Stops are installed on all sides of the opening. Screen Panels (or Walls) are inserted into each opening and pushed forward until resting against the stop. Units are then screwed in place either by face screwing into the stop or by side screwing into the structure's columns.
Side Screw Installation SMALL STOPS WITH SIDE SCREWS for full.pdf version
Face Screw Installation: SMALL STOPS WITH FACE SCREWS for full .pdf version
Large Stop Mount
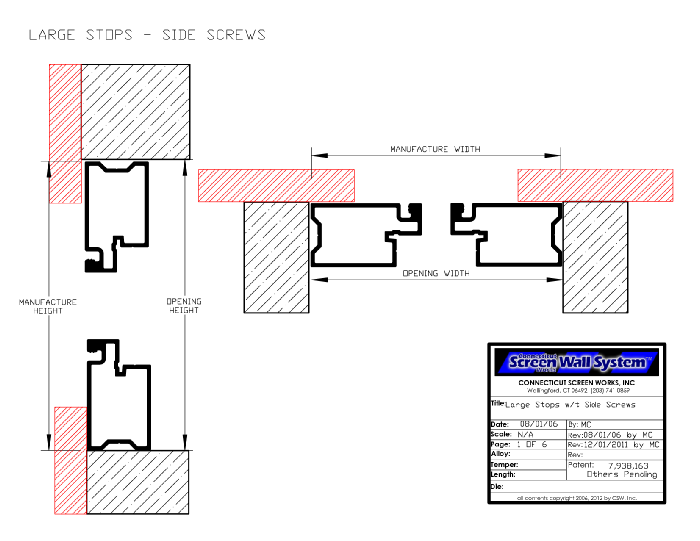
Oversized fascia creates a stop. Screen Panels(or Walls) are inserted into each opening and pushed forward until resting against the stop. Units are then screwed in place either by face screwing into the stop or by side screwing into the structure's columns.
Side Screw Installation LARGE STOPS WITH SIDE SCREWS for full .pdf version
Face Screw Installation: LARGE STOPS WITH FACE SCREWS for full .pdf version
r Channel Mount
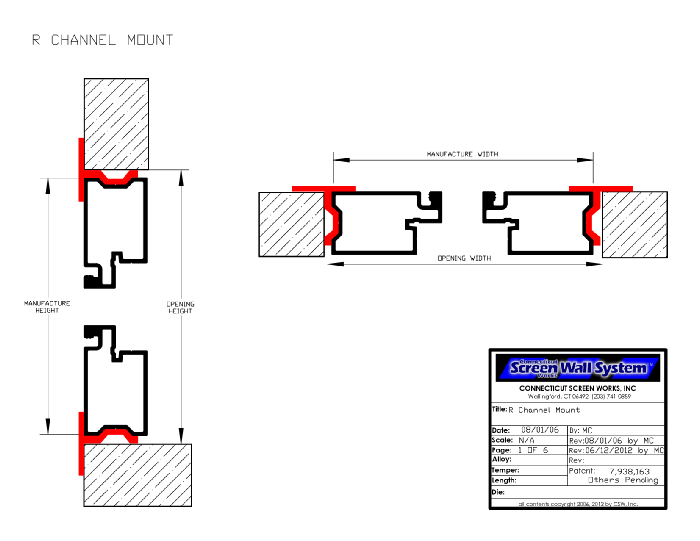
The “r” channel is used as a mounting flange or starter strip. “R” channel is installed on 1, 2, or all 4 sides of the Screen Panel (or Walls). Unit is mounted in place by screwing through the “r”channel flange. Panels can be placed inside (as shown in this detail) or it can be reversed and installed around opening. See “Other Mounts”for other “r” channel mounting suggestions.
See r CHANNEL MOUNT for full .pdf version
Angle Stop Mount
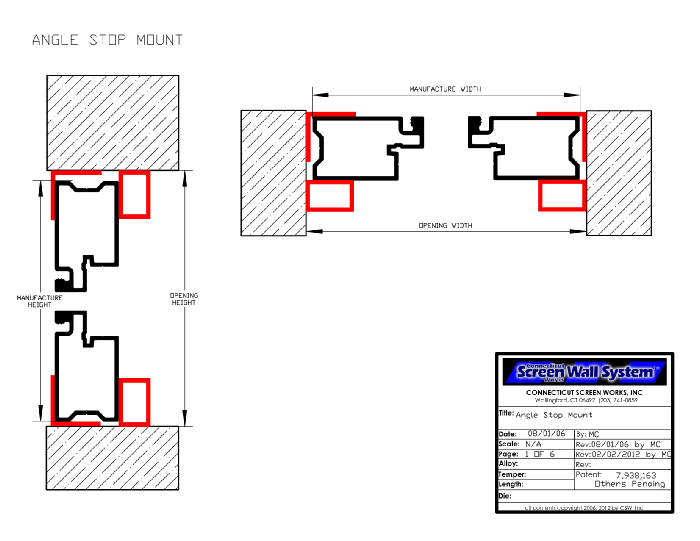
Commercial style method which entails an angle stop on all four sides of the opening. Screen Panels (or Walls) are inserted into each opening and pushed forward until resting against the stop. (Base and/or side shimming with foam or blocks may be required to center panel within opening) The interior stop is then installed firmly against the screen frame.
See ANGLE STOP MOUNT for full .pdf version
Face Mount
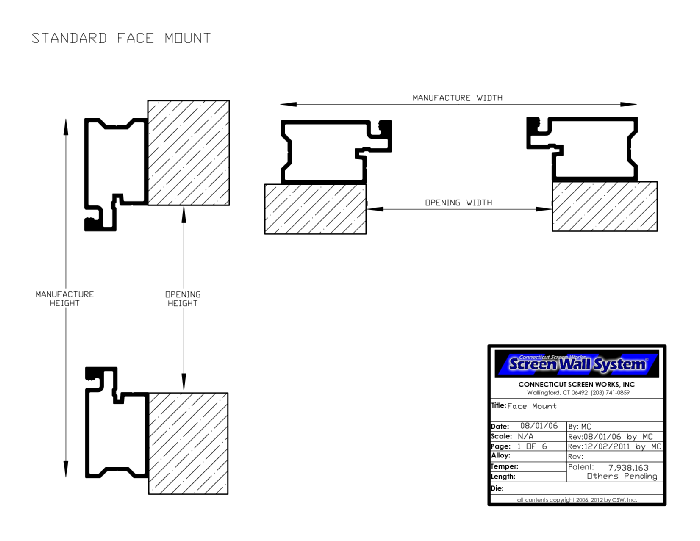
Panels (or Walls) are sized larger than the opening to be screened. The frame will overlap 3 or 4 sides of the opening. Panel is centered over opening and face screwed in place. This application is used when the panel will overlap all four sides of the opening as well as applications where the panel will sit on the floor and only overlap the sides and top.
See FACE MOUNT for full .pdf version
Other Mounts

The mounting suggestions provided are not every possible method. Many customers designed their own - quite unique installations - based upon their requirements. Detailed here are other suggestions using stock extrusions and other materials. Ideas to keep in mind when designing your own installation: Keep the installation simple and secure, carefully plan and calculate all sizes, and always consider future repair needs.
See MOUNTING ALTERNATIVES for full .pdf version