Connecticut Screen Works Screen Wall System®
Using the “r” Channel

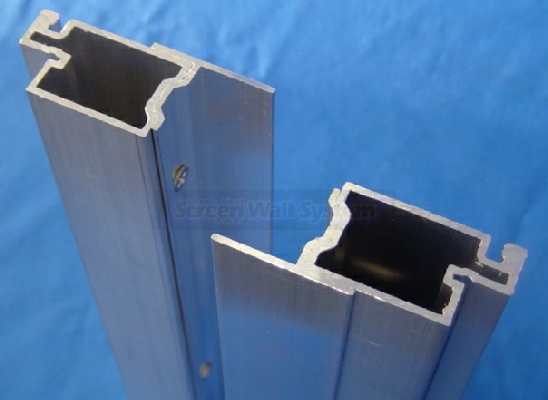
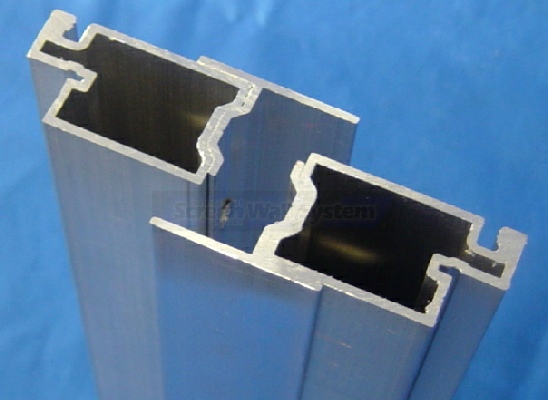
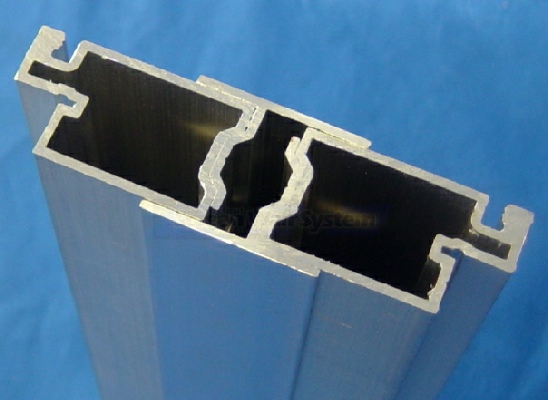
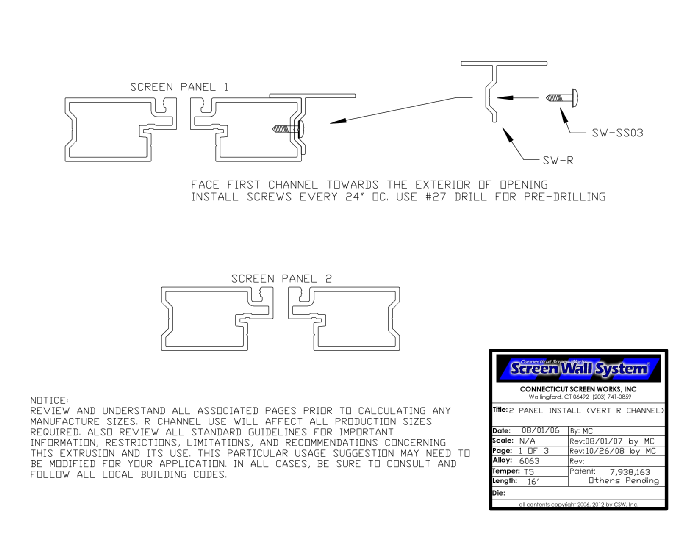
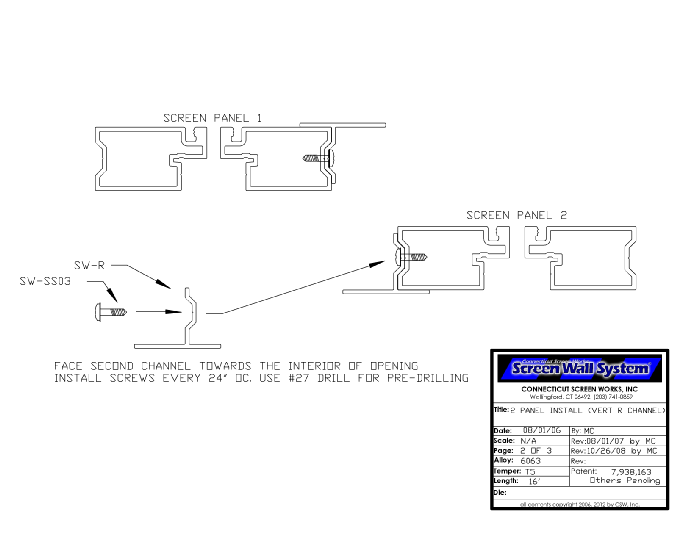
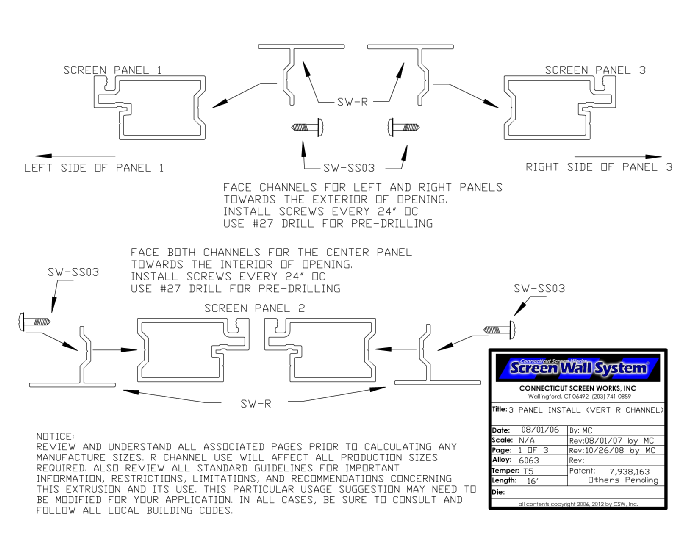
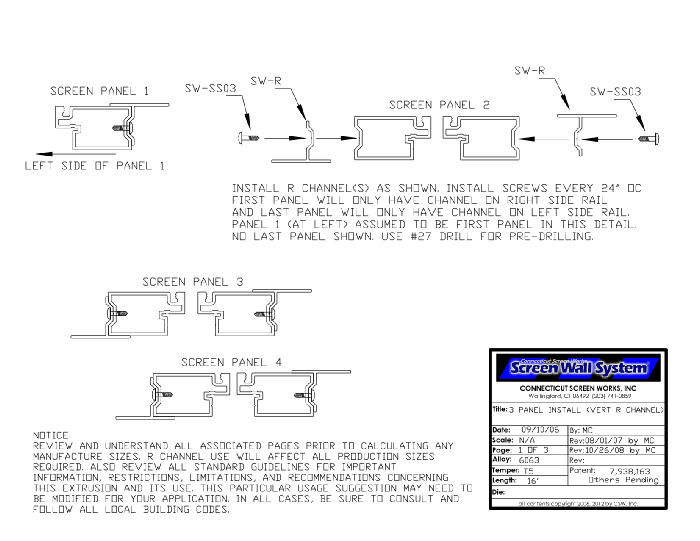
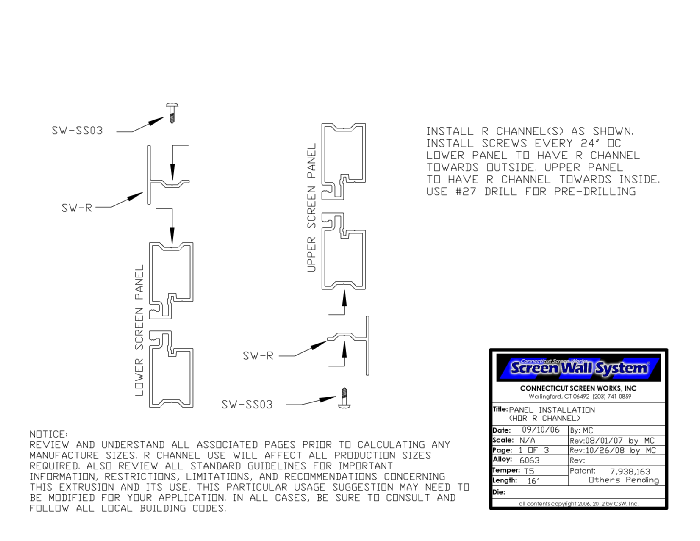
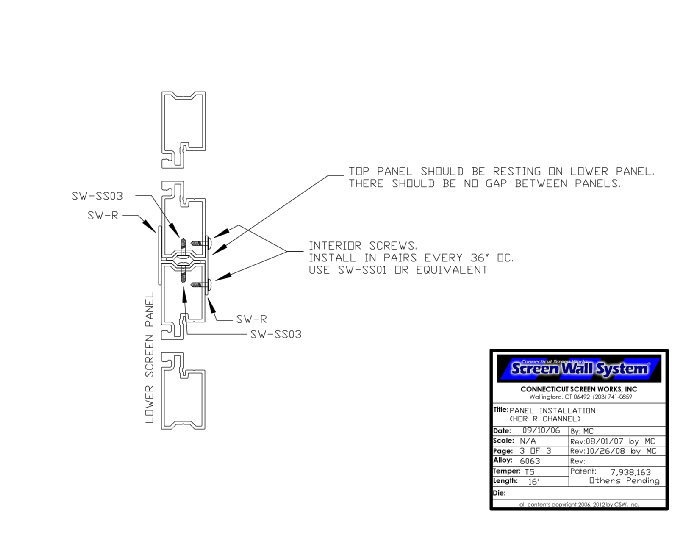
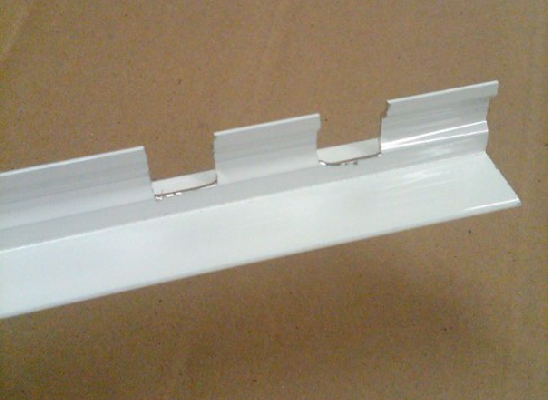
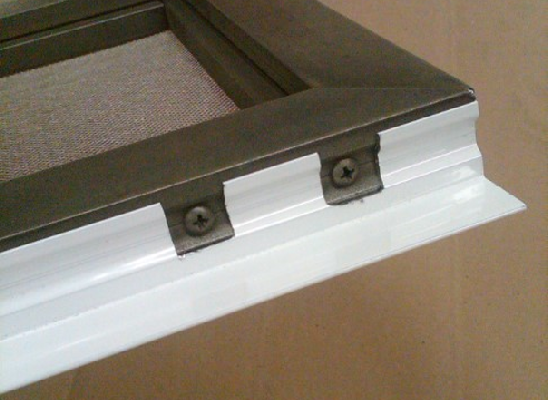
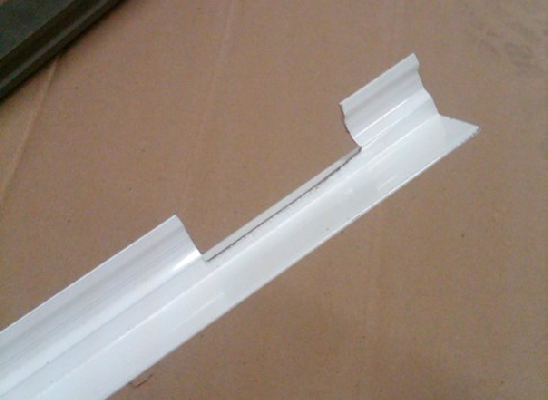
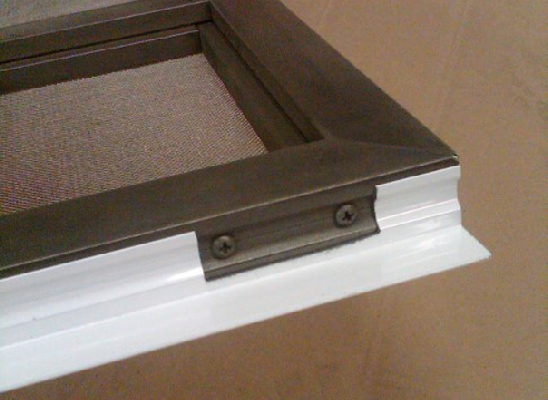
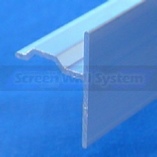
The “r” Channel is an ambidextrous, multi-use, extrusion that can be installed on either side of the Master Frame and used as a mounting flange, starter strip, seam cover, expander, corner, door stop, etc.

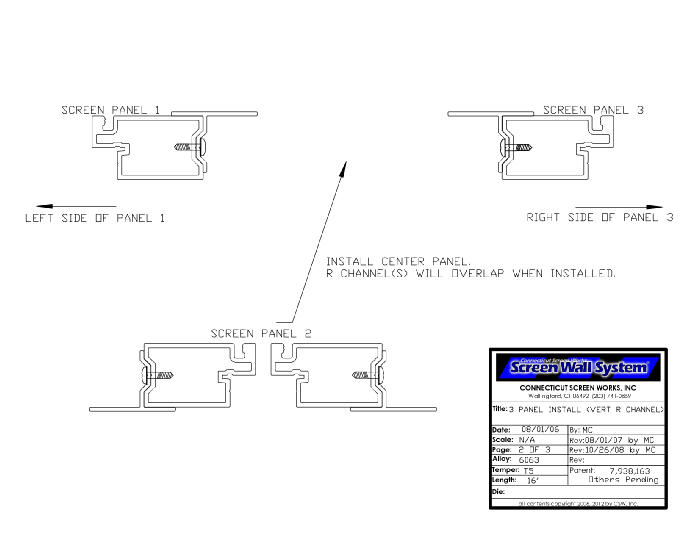
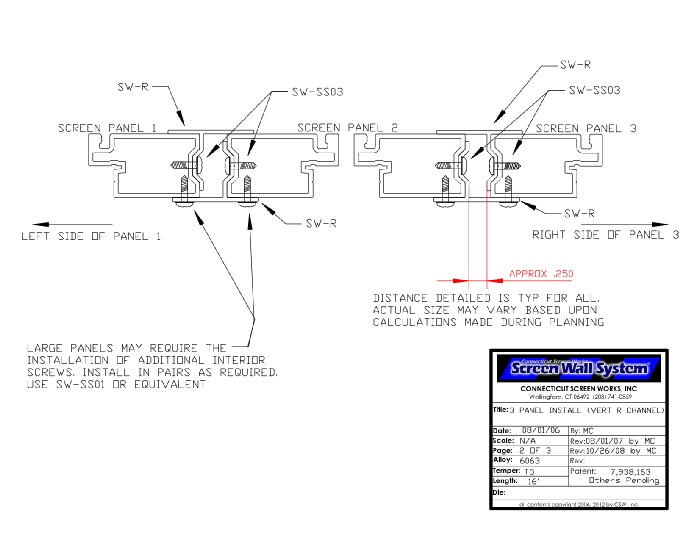
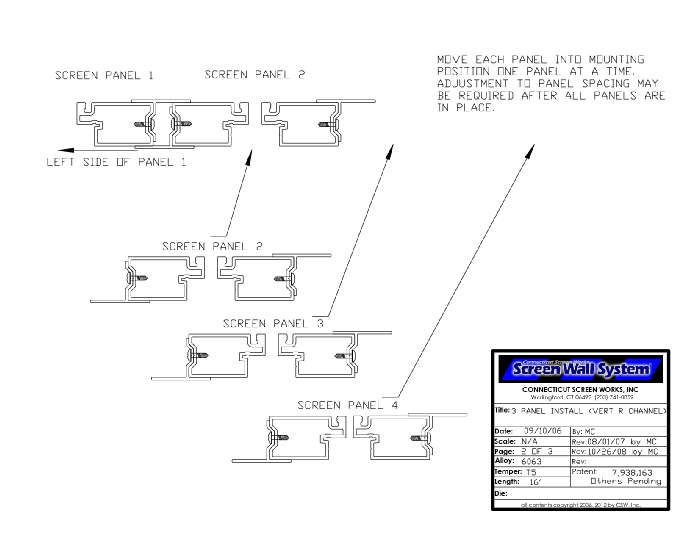
When installing two panels, three panels, or 4 or more panels (or walls) the “r” channel is used to cover seams between adjoining units. Pay particular attention to the details shown - orientation is different based upon number of panels being installed. Also be sure to review "notching" at the bottom of the page … required for all applications.


2 Panel Seam Cover

Pay careful attention to your sizing calculations. You must not only size your panels to fit within the opening but you must also account for the space the “r” channels will require for installation. To achieve a proper fit and to allow for adequate installation clearance of the “r” channel, each frame will need the width reduced width by 1/4". This reduction is to take place after you have made all panel sizing calculations. The 1/4" reduction - per frame - will only provide for “r” channel installation.

CLICK TO SEE FULL .pdf : 2 PANEL SEAM COVER


3 Panel Seam Cover

Pay careful attention to your sizing calculations. You must not only size your panels to fit within the opening but you must also account for the space the “r” channels will require for installation. To achieve a proper fit and to allow for adequate installation clearance of the “r” channels, each frame will need the width to be reduced. The reduction calculation is 1/4" per “r” channel.  Note the details included below: Panel 1 has one “r” channel on the right upright, Panel 2 has one “r” channel on each upright, and Panel 3 has 1 “r” channel on the left upright. This totals 4 “r” channels - at 1/4" per “r” channel - or a required TOTAL reduction of 1".This total reduction may be made to 1 panel, 2 panels or to all 3 panels.It is normally desirable to spread the reduction out equally over each panel. However you decide to allocate the reduction it must equal the TOTAL required reduction.

For example:
Panel 1 - 1/4" / Panel 2 - 1/2" / Panel 3 - 1/4"    Panel 1 - 0" / Panel 2 - 1" / Panel 3 - 0"    Panel 1 - 1/2" / Panel 2 - 0" / Panel 3 - 1/2"    etc.

SEE .PDF: 3 PANEL SEAM COVER


4 or More Panel Seam Cover

Pay careful attention to your sizing calculations. You must not only size your panels to fit within the opening but you must also account for the space the “r” channels will require for installation.To achieve a proper fit and to allow for adequate installation clearance of the “r” channels, each frame will need the width to be reduced. The reduction calculation is 1/4" per “r” channel. Note the details included below: Panel 1 has one “r” channel on the right upright, Panel 2 has one “r” channel on each upright, Panel 3 has one “r” channel on each upright, and Panel 4 has 1 “r” channel on the left upright (For the purposes of this explanation, the “r” channel shown on the right side of Panel 4 - in the detail - is to be disregarded). This totals 6 “r” channels - at 1/4" per “r” channel - or a required TOTAL reduction of 1-1/2". This total reduction may be made to 1 panel, 2 panels, 3 panels or to all 4 panels. It is normally desirable to spread the reduction out equally over each panel. However you decide to allocate the reduction(s) it must equal the TOTAL required reduction.

For example:
Panel 1 - 1/4" / Panel 2 - 1/2" / Panel 3 - 1/2" /  Panel 4 - 1/4"
Panel 1 - 1/2" / Panel 2 - 0" / Panel 3 - 1/4" /  Panel 4 - 3/4"
Panel 1 - 0" / Panel 2 - 1" / Panel 3 - 1/2" /  Panel 4 - 0"    etc.


Horizontal Seam Cover

Stacked panels require the “r” channel to be installed horizontally. Of all of the mounts and panel installation practices, those utilizing a stacking method will have the greatest chance for failure. Stacking should be avoided if possible. When used, do not stack more than two panels and each panel should be 60” or less in height. Pay careful attention to your sizing calculations. You must not only size your panels to fit within the opening but you must also account for the space the “r” channels will require for installation. To achieve a proper fit  (which needs to be a tight fit) - reduced the height of each frame by 1/8". This reduction is to take place after you have made all panel sizing calculations. The 1/8" reduction - per frame - will only provide for R channel installation in between a two panel stack.


Channel Notching

Proper installation of the “r” channel requires notches be created so a clean and flat installation will be achieved. This is simply done by a hacksaw or power chop saw in one of two typical fashions.

Double Notch: Cut two small notches using a hack saw or chop saw.Cut the sides of each notch and then use a Channel Lock or plyer type tool and bend the tab back and forth until it breaks out.

Single Notch: Cut one large notch using a hack saw or chop saw. Cut the sides of the notch as well as 2 or 3 additional cuts along the length. (this will create several smaller tabs). Use a Channel Lock or other plyer type tool and bend the tabs back and forth until they break out.

Install “r” channel attaching screws following the standard screw pattern detailed for installation screws. 6” from each end and them every 24” or 36” based upon insert usage or not.